Obtaining a certificate: Difference between revisions
Jump to navigation
Jump to search
| (16 intermediate revisions by 3 users not shown) | |||
| Line 1: | Line 1: | ||
== Quick documentation == | == Quick documentation == | ||
If you | If you are familiar with the certificates request procedure and you are confident, follow these steps, otherwise go to section '''More extensive documentation''': | ||
1. Go to | 1. Go to https://cert-manager.com/customer/belnet/idp/clientgeant; | ||
2. Choose your institution, and login; | 2. Choose your institution, and login; | ||
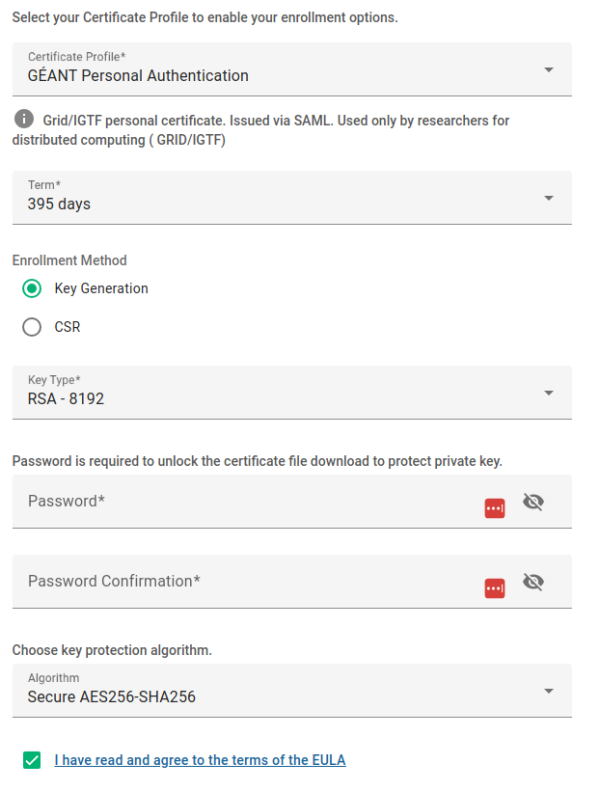
3. Request a ''' | 3. Request a '''GEANT Personal Authentication''' certificate and use '''RSA - 8192''' as Key type for Key Generation; | ||
4. You | 4. Give a Password to secure the P12 file that contains the certificate and '''Submit''' and '''Agree''' with the EULA; | ||
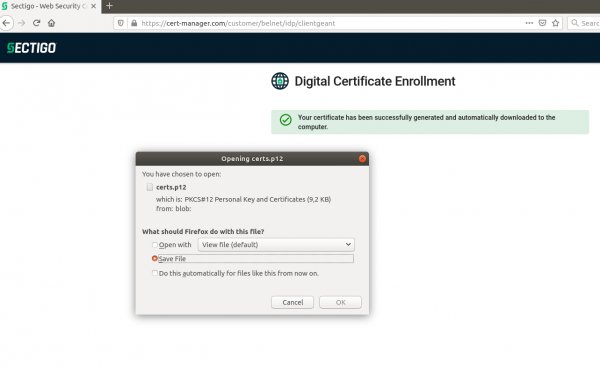
5. This last step will trigger automatically the download of your certificate in a P12 file; | |||
6. You now have to upload the certificate on you browser. | |||
== More extensive documentation == | == More extensive documentation == | ||
<span style="color: red;">'''Go to | <span style="color: red;">'''Go to https://cert-manager.com/customer/belnet/idp/clientgeant'''</span> | ||
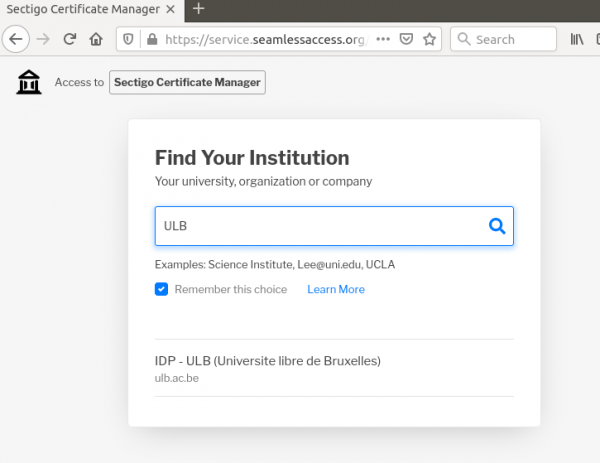
[[File: | [[File:Choose_IDP-institution.png|600px|thumb|left|Choose your institution, e.g., by typing 'ULB' or 'VUB']] | ||
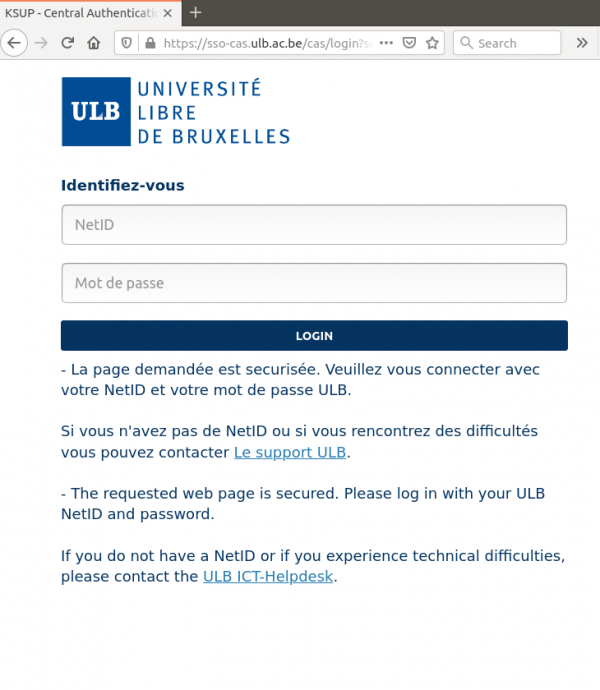
[[File: | [[File:Institution-IDP.png|600px|thumb|left|Login with your institution credentials. This page will look different for different institutions.]] | ||
[[File:New_certificate_type.png|600px|thumb|left|Request a '''GEANT Personal Authentication''' certificate and use '''RSA - 8192''' as Key type for Key Generation.]] | |||
[[File: | [[File:Download_Certificate.png|600px|thumb|left|A this point the certificate is generated and you can just save it in your computer]] | ||
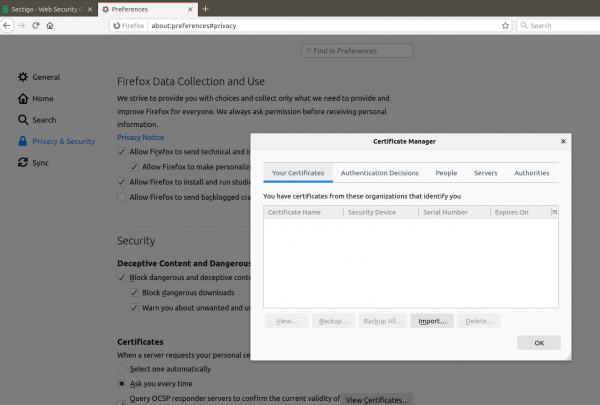
[[File: | [[File:Firefox_Certificate_page.png|600px|thumb|left|On your browser, go to <br> '''[Firefox]''' Preferences -> Certificates -> View Certificates <br> '''[chrome]''' Settings > Privacy and Security > Security > Manage Certificates > Your Certificates ]] | ||
[[File: | [[File:Firefox_Import.png|600px|thumb|left|Press the Import button and select the cert.p12 files you just downloaded]] | ||
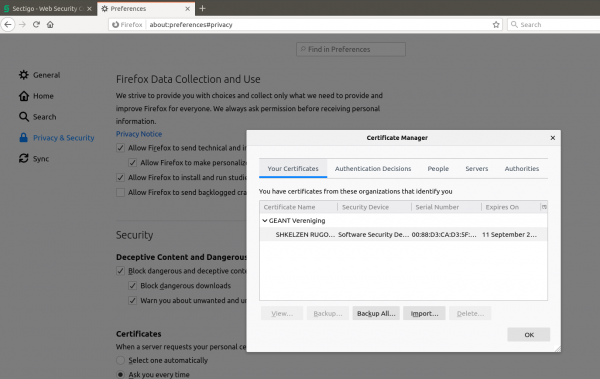
[[File:Firefox_Import_done.png|600px|thumb|left|The certificate is now listed in the Certificate Manager]] | |||
Latest revision as of 08:38, 5 October 2023
Quick documentation
If you are familiar with the certificates request procedure and you are confident, follow these steps, otherwise go to section More extensive documentation:
 1. Go to https://cert-manager.com/customer/belnet/idp/clientgeant;
 2. Choose your institution, and login;
 3. Request a GEANT Personal Authentication certificate and use RSA - 8192 as Key type for Key Generation;
 4. Give a Password to secure the P12 file that contains the certificate and Submit and Agree with the EULA;
 5. This last step will trigger automatically the download of your certificate in a P12 file;
 6. You now have to upload the certificate on you browser.
More extensive documentation
Go to https://cert-manager.com/customer/belnet/idp/clientgeant
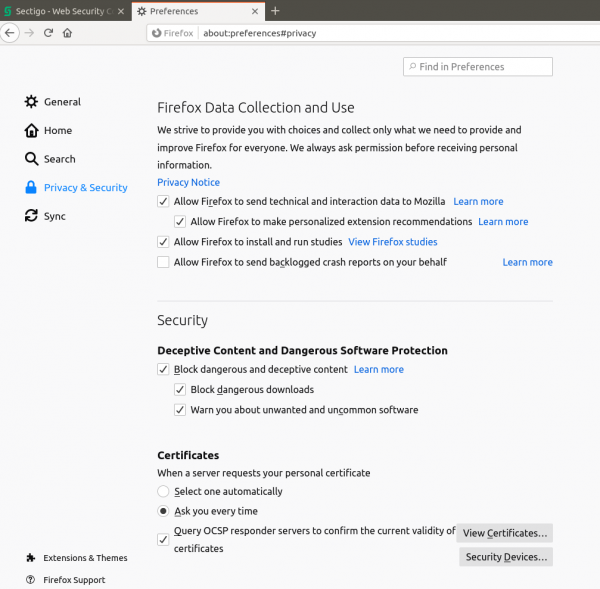
[Firefox] Preferences -> Certificates -> View Certificates
[chrome] Settings > Privacy and Security > Security > Manage Certificates > Your Certificates
